Installing wheel nut indicators is a crucial step in maintaining vehicle safety, especially for those involved in commercial transportation.
These indicators are designed to visually signal whether the wheel nuts are properly tightened, helping to prevent accidents caused by loose or improperly torqued nuts.
Here’s the right way to install wheel nut indicators:
Select the Correct Size:
Before installation, ensure that you have the correct size of wheel nut indicators for your vehicle.
Wheel nut indicators come in various sizes, so it’s essential to choose those that match the size of your wheel nuts.
Verify Wheel Nut Tightening Specifications:
Refer to the vehicle’s manual or contact the manufacturer to determine the recommended torque specifications for your wheel nuts.
Proper torque ensures that the indicators function as intended and that the wheels are securely fastened.
Clean the Wheel Nuts:
Thoroughly clean the wheel nuts and stud threads before installing the indicators. This helps ensure a secure fit and prevents any interference with the indicators due to dirt or debris.
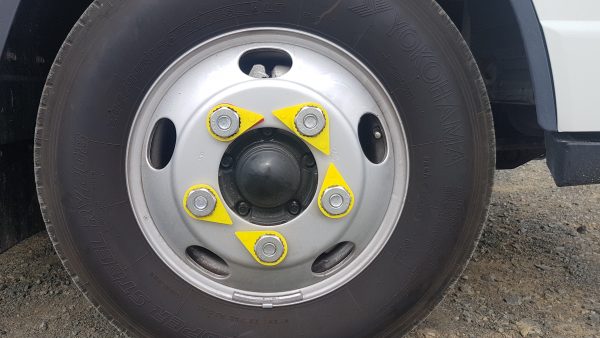
Position the Wheel Nut Indicators:
Place the indicators on the wheel nuts in a way that allows easy visibility. The indicators are typically installed at regular intervals around the wheel, making it easy to detect any loosening by visual inspection.
Securely Push the Indicators onto the Nuts:
Wheel nut indicators are often designed to snap onto the wheel nuts securely. Apply firm and even pressure to push the indicator onto the nut. Some indicators have clips or grooves that latch onto the nut, providing a secure fit.
Check for Proper Alignment:
Ensure that the indicators are aligned uniformly around the wheel. Proper alignment is crucial for accurate visual inspection. Misalignment may indicate uneven torque or potential issues with the wheel fastening.
Rotate the Wheel:
Rotate the wheel to confirm that the indicators do not interfere with any other components and that they rotate freely with the wheel.
This step ensures that the indicators remain functional and do not compromise the overall safety of the wheel assembly.
Perform a Visual Inspection:
After installation, visually inspect the wheel nut indicators regularly. Look for any signs of damage, wear, or misalignment. If any indicators appear loose or are damaged, replace them promptly.
Monitor Indicators During Routine Maintenance:
Include the inspection of wheel nut indicators as part of your routine vehicle maintenance. Regularly check for any indicators that may have become loose or dislodged, and replace them as needed.
Replace Damaged or Missing Indicators:
If you notice any damaged or missing wheel nut indicators during inspections, replace them immediately. Prompt replacement ensures that the safety function provided by the indicators remains intact.