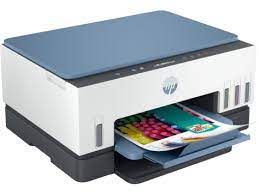
In the era of seamless connectivity, setting up your HP printer to work wirelessly is a game-changer. hp printer wifi connect not only eliminates the need for cumbersome cables but also allows you to print from any device within your network. In this comprehensive guide, we’ll take you through the step-by-step process of connecting your HP printer to WiFi, ensuring a hassle-free and efficient setup.
Step 1: Prepare Your Network Information
Before you begin the setup, gather essential information about your WiFi network. Note down the network name (SSID) and password. This information is crucial for a smooth connection process.
Step 2: Power On Your HP Printer
Ensure that your HP printer is powered on. If it’s in the middle of a print job, wait for it to complete before proceeding. A powered-on printer is necessary to access the settings for WiFi configuration.
Step 3: Access the Control Panel
Locate the control panel on your HP printer. The control panel is typically on the front or top of the printer. Once located, press the “Setup” or “Menu” button to access the main settings menu.
Step 4: Navigate to Wireless or Network Settings
Using the navigation buttons on the control panel, scroll through the menu options until you find “Wireless” or “Network” settings. Select this option to access the wireless setup menu.
Step 5: Choose WiFi Setup
Within the wireless settings, look for the “WiFi Setup” or “Wireless Setup Wizard” option. This wizard will guide you through the process of connecting your HP printer to your WiFi network.
Step 6: Select Your WiFi Network
The WiFi Setup Wizard will display a list of available WiFi networks. Scroll through the list and select your WiFi network from the options presented. If your network is hidden, enter the SSID manually.
Step 7: Enter WiFi Password
Once you’ve selected your WiFi network, the HP printer will prompt you to enter the WiFi password. Use the keyboard on the control panel to input the password accurately. Pay attention to uppercase and lowercase letters.
Step 8: Confirm and Connect
After entering the WiFi password, confirm the settings. The HP printer will attempt to connect to the WiFi network. Once the connection is successful, the printer will display a confirmation message.
Step 9: Print a Wireless Test Report
To ensure that your HP printer is successfully connected to the WiFi network, print a Wireless Test Report. This report provides details about the printer’s wireless settings, confirming a secure and stable connection.
Step 10: Test a Wireless Print Job
Finally, initiate a test print from a device connected to the same WiFi network. This ensures that the HP printer is functioning correctly and can receive print jobs wirelessly.
Conclusion:
hp printer won’t connect to wifi is a straightforward process when you follow these step-by-step instructions. By accessing the control panel settings, selecting the WiFi network, and entering the password, you’ll have your HP printer seamlessly integrated into your wireless network. Enjoy the freedom and convenience of wireless printing from various devices, making your printing experience more flexible and efficient.