Connecting your canon printer is offline how to fix windows 10 can significantly enhance your printing experience, allowing you to effortlessly produce high-quality prints from your Apple device. In this comprehensive guide, we’ll walk you through the steps to establish a smooth connection between your Canon printer and Mac, ensuring a seamless and efficient printing process.
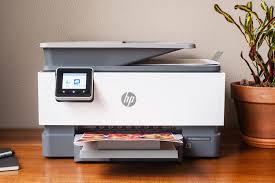
Step 1: Unbox and Set Up Your Canon Printer
Begin by unboxing your Canon printer and placing it in a suitable location within the range of your Mac. Power up the printer and follow the initial setup instructions provided in the printer’s manual. Make sure the printer is connected to a power source and turned on.
Step 2: Connect Your Canon Printer to Wi-Fi
For wireless printing, ensure that your Canon printer is connected to the same Wi-Fi network as your Mac. Access the printer’s control panel and navigate to the wireless settings. Follow the on-screen instructions to connect the printer to your Wi-Fi network.
Step 3: Install Printer Drivers on Your Mac
Before connecting your Canon printer to your Mac, it’s crucial to have the necessary drivers installed. Visit the official Canon website and locate the drivers section. Download the latest drivers compatible with your printer model and the macOS version running on your Mac.
Step 4: Connect the Canon Printer to Your Mac
Connect your Canon printer to your Mac using a USB cable. Ensure that the cable is securely plugged into both the printer and an available USB port on your Mac. This direct connection is especially useful for the initial setup and driver installation.
Step 5: Turn on Your Canon Printer
Power on your Canon printer and allow it to complete its startup process. The printer should now be ready to communicate with your Mac.
Step 6: Add the Printer on Your Mac
On your Mac, go to “System Preferences” and select “Printers & Scanners.” Click the ‘+’ icon to add a new printer. Your Canon printer should appear in the list of available printers. Select it and click “Add” to establish the connection.
Step 7: Configure Printer Settings
Once the printer is added, you may have the option to configure additional settings, such as paper size, orientation, and print quality. Adjust these settings according to your preferences.
Step 8: Test a Print Job
Initiate a test print to ensure that your Canon printer is correctly connected to your Mac. Print a sample document or image to verify that the communication between your Mac and the printer is successful.
Step 9: Explore Additional Features
Canon printers often come with additional features and software for enhanced printing capabilities. Explore the Canon software suite to take advantage of functions such as scanning, photo printing, and more.
Conclusion:
how to connect canon printer to mac :-Congratulations! You’ve successfully connected your Canon printer to your Mac, paving the way for efficient and high-quality printing. By following these step-by-step instructions, you’ve ensured that your Canon printer is seamlessly integrated with your Mac, allowing you to print documents and photos with ease. Enjoy the convenience of printing directly from your Mac to your Canon printer for a streamlined and productive experience.